Photo1- This is the house site.

Photo2,3,4-Clearing the site. Luckily Uncle Varomue had cleared the site previously when he built his house. So it was mainly weeding , burning down stumps, clearing rocks etc.


Photos5,6,7,8- Collecting the rocks and sand which will be used as aggregate for our concrete mix for the foundations. That’s Dad and Uncle Riga proudly sitting upon our heap of aggregate. It took days for us to get that pile.


Photos9,10,11- Shane, Dad and myself building the workshop.


 Photo12- The first hole dug and waiting for concrete.
Photos13,14,15- Concrete mixing ,placing of the steel post holders and setting the foundations. Thank God Dad was there to help. He did all the surveying for the foundations and then also worked out all the levels for the posts, exactly where we were going to notch the posts to house the bearers, joists and top plates. Later when we started to bolt the house together, everything went together perfectly, the house is perfectly level, square and plumb. Once the top plates were installed we checked the square of the house by measuring the diagonals. The house was out of square by a matter of millimetres. This is quite amazing considering that all the major members of the house are hand cut with a chainsaw and therefore are far from being straight.


Photo16- Foundations are in and awaiting the posts.

Photos17,18,19,20- Preparing and installing the posts. By the way these posts were forkin heavy. The tree we used for the posts is specifically used for posts here as they last a long time in the ground. Of all the wood we cut the posts were the hardest and heaviest wood to work with. At times it felt like cutting through concrete and I would have to sharpen the chainsaw 3 times as often, compared to other trees. You can also see us cutting the notches in the posts, which will later house the bearers, joists and top plates.


 Photos21-25- Installing the first bearer. Photo 24, Post has been notched and painted with creosote. As you can see with all those notches in the posts, if our levels were out and the major beams that were to be housed in the notches didn’t fit in perfectly, we would have to throw the post out, and go cut another tree down. Which is something I really did not want to do. Photo 25 is the bearer housed and bolted into the post. The bolts at the bottom are for the post holder to attach the post.


Photo 26- All the posts are up. It took 3 days to install the posts. I was nervous as all hell for those 3 days as the only way we could lift the posts up to the vertical was manually. I was so scared that the posts would tip over and land on somebody, which if happened would injure them permanently due to the sheer weight of the things. We managed to install all the posts without a single nail chipped only my nerves a little frayed, thank God!!

Well thats the house to the post stage. Dad and Shanes presence made a huge difference for me as I felt for once I could just ask them to do something and not have to worry about it being done properly or something going wrong or breaking. I felt like I was on holidays for once, which was very nice. I must say I was surprised by dads stamina and strength. All the work we did was hard and heavy labour. This in itself is difficult but when you add in the climate- the humidity and the sheer strength of the sun, it makes work during the middle of the day almost impossible. For example none of the local men work during the middle of the day, due to the strength of the sun. We, on the other hand, worked all day long and only had a break for lunch. I didn’t think Dad would be able to do it, but as it turned out he was always the first one out after lunch, keen as mustard. At times I felt like knocking him out just so we could have a longer break. I took him spear-fishing thinking this will bugger him. We first walked from our village to Itumuta which is about 5km, jumped in the water and spear-fished all the way back to our village, which is about 3km.By the way your not just lazily swimming along, its hard work spear-fishing. He looked pretty buggered when we got back, but he had a nap and was ready to go again that afternoon. With any luck when I get to dads age I will have the same strength and stamina that he has.
Until the next exciting instalment, Au revoir.. Carl..
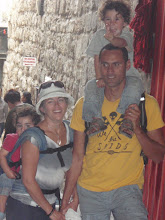
Am adding Carls next blog here so you can see the whole process up to date, sorry it is so long, have a nap if you need to.. X Nadine


Hey, Here we go again. Well this post will bring you up to date to where we are at right now in regards to the house. The work has slowed down a bit in the last week as we are all a little burnt out. Also Nadine and the kids are leaving soon so there have been a few going away parties to attend, which means the ensuing day is a right off. Once again another pictorial post.
Photo27-30 are installing the joists through to them being painted with the creosote solution. The joists took us quite awhile to do as we had never laid joists before and they all had to be exactly level, so that when the floorboards go on they don’t undulate or step up or down in level.


Photo31-32 are the first and the last top plates being installed. Effectively they form a ring beam around the house, on which the rafters will be notched into and also the walls.


Photo33-35 Here we are building the platform for us to stand on for when we install the ridge beam. Of all the parts of the house the roof was the part that concerned me the most. I had no idea how we were going to build it, and I had been stressing about it since the idea to build a house came into my head. Luckily Uncle Varomue had previously built his house and had been paying attention when he and the carpenter installed the roof. I must say that if it wasn’t for Varomue I don’t think I would of been able to do the roof. In the end it was no where near as difficult as I imagined. I found it strange that of all the things that we have tackled in this house, the roof was of most concern to me. You can also see us building what look like goal posts. The ridge beam will sit on the goal posts and be held in position for us to nail the rafters onto it. The last photo is the goal posts finished and the ridge beam centred awaiting the rafters.


Photos36-38 Installing the rafters. The first set of rafters through to completion of the rafters. Something that amazed me about the rafters is that once we cut the birdsmouth joint at the bottom, which is where the rafter sits on the top plate, the rafter practically held itself in place, despite the notch in the rafter only being tiny. I admit the last sentence was probably as fascinating as bat shit, unless you are budding diy builder, which somewhat narrows the audience down to 2.


Photos 39-42 are of the purlins [don’t think this is the correct name], being installed, the verandah roof being built and the rafters being straightened so as to look neat. Oh yeah also the brace for the roof, which is that V shape you can see in all that tangle of wood. I was very proud of the brace which we did, which was notched into the rafters before we put the purlins in place. However we may have made a mistake as apparently it goes on the underside of the rafters not the top of the rafters. Hopefully this makes no difference structurally. It doesn’t seem to as the roof became solid as a rock once it was braced.


Photos 43-48 is the roofing iron going on. The last few photos are of where we are at right now with the building. The roof has got another 2 days work and then we will have completed everything on the roof, fascia boards, side flashing, battens, the lot, which will be nice. In the photo of us all sitting on the side of the roof, you can see one person sitting on the ridge of the roof. This is Uncle Riga, who is 73yrs old. At this age he is still able to climb through rafters and swing himself up onto the ridge of the roof, which is something that I struggled to do at less than half his age. He then pulls the roofing iron up and holds it in place by himself whilst the rest of us screw the roofing iron down. Last post was me showing my amazement at Dads stamina and strength. Even by Dads reckoning Uncle Riga is a freak!!


Once the roof is done we will start building the framing for the walls, windows and doors. I have no idea how long this will take but I have 5 weeks before I leave. If history is anything to go by the walls will not be finished before I leave, which means the walls and the floor will have to wait till we come back before being installed. As it always seems to go with building projects, they run over time and over budget, and this one is no exception. The main thing however is that the roof is on and the wood is somewhat protected from the elements. It would be great to be able enclose it completely, but we will see how we go. In some ways it works out good that we are going away for a period of time and that we will come back again to finish the house. We have been working from sunrise to sunset 6 days a week and as I said before we are all burning out a little and now that we are coming to the finishing touches on the house it would be a pity to not do a good job, just because we are tired of the work. Even spearfishing has become a little boring for different reasons, and I have only managed to go once a week for the last month.
This will probably be the last post from me for awhile, as Nadine is going and she looks after the blog. When I get to Israel I will update the photos and post another exciting instalment in the longest running house construction in the Southern hemisphere.
Bye and take it easy peeps.. Carlos
Love your work Carl, it shits on grand designs!
ReplyDeleteBen
I'm pretty sure I will never be a DIY house builder, but I am finding your detail fascinating and I'm very, very impressed!!!!
ReplyDeleteMarilyn